Conduit Installation Guide: Top Step-by-Step Tips 2024
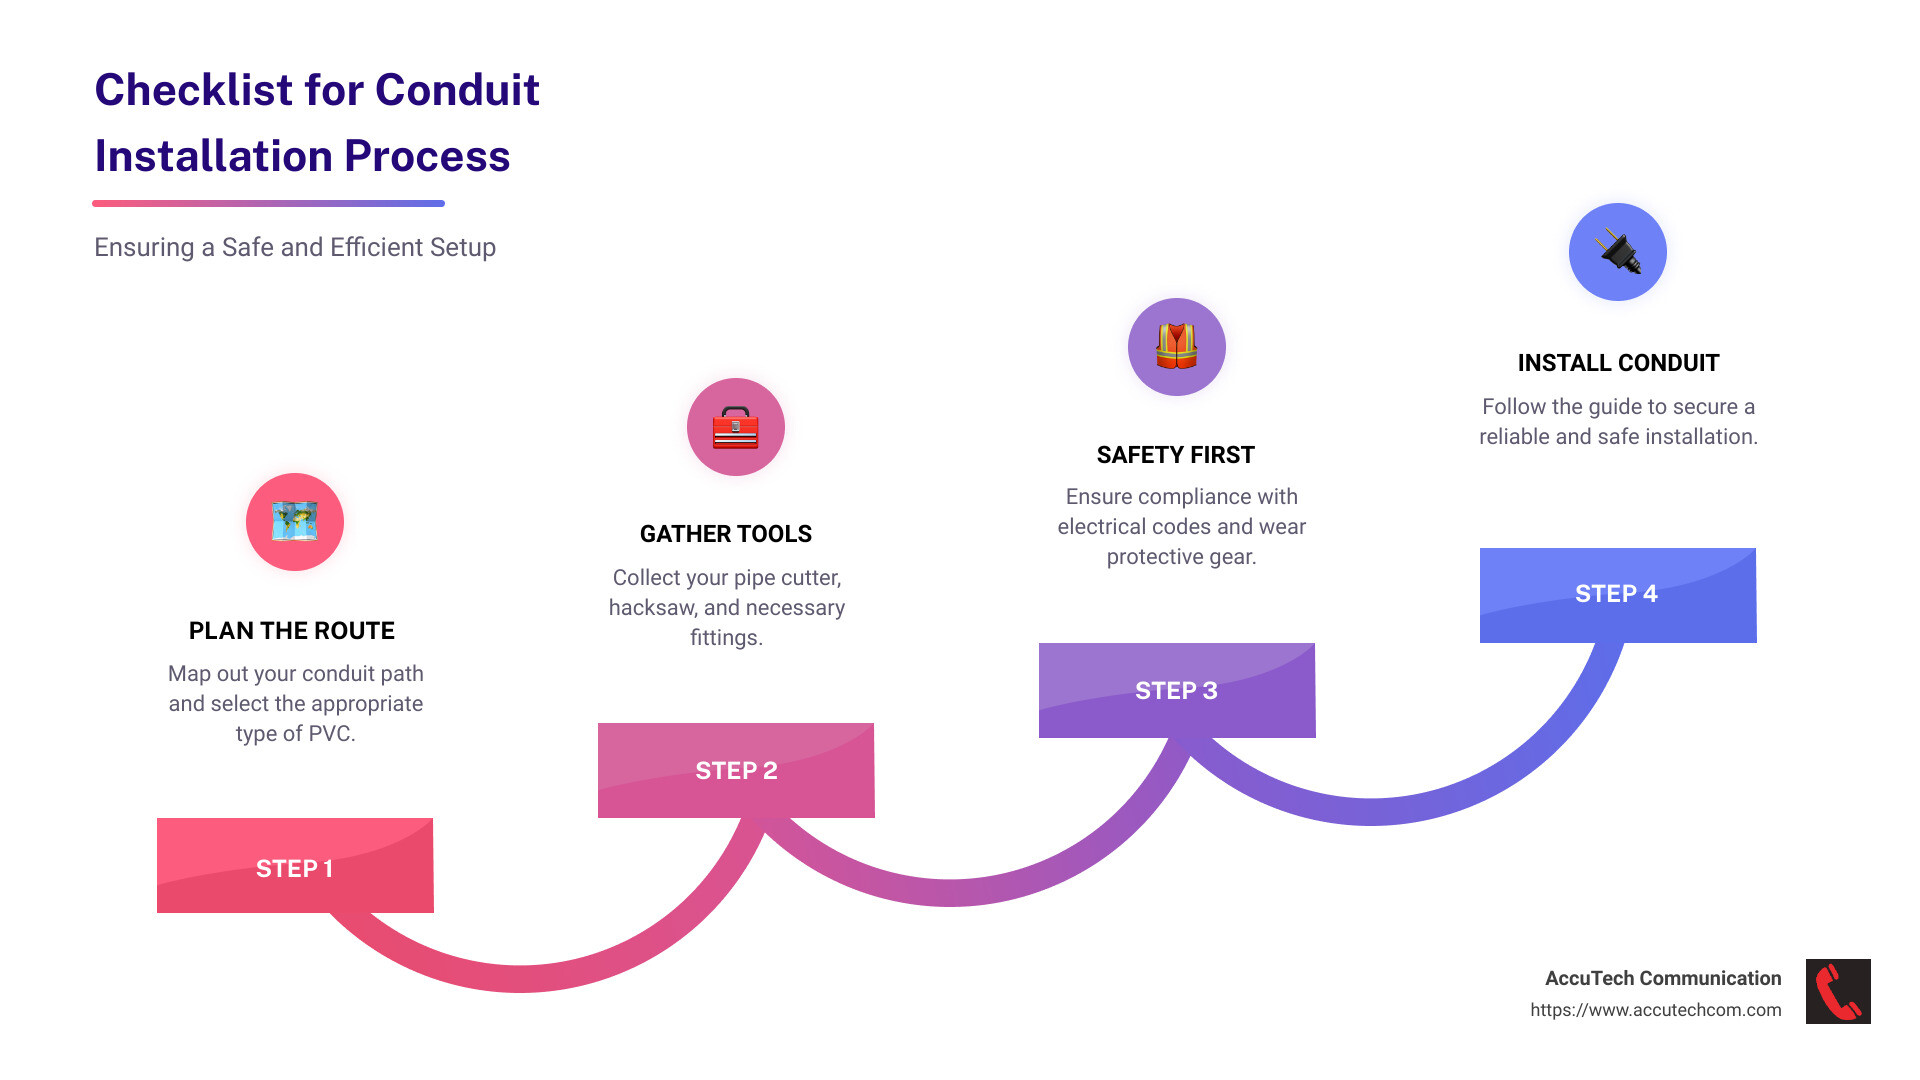
If you’re searching for a conduit installation guide, you’ve come to the right place. Here’s a quick checklist to get you started:
- Plan the Route: Map out your conduit path and choose the appropriate type of PVC.
- Tools: Gather your pipe cutter, hacksaw, and necessary fittings.
- Safety: Ensure compliance with electrical codes and wear protective gear.
Installing PVC electrical conduit is more than setting up a path for wires—it’s about ensuring safety and reliability in your electrical systems. The importance of following a robust conduit installation guide cannot be overstated. Proper installation protects cables from damage, promotes efficient energy flow, and minimizes risks like shorts or fires. Following safety protocols — from using the right tools to complying with codes like the National Electrical Code (NEC) — is crucial to a successful installation.
I’m Corin Dolan, owner of AccuTech Communications, and I bring decades of expertise in electrical conduit installations and network cabling. With a focus on strategic planning and custom solutions, conduit installation guide insights are at the heart of our approach, ensuring robust communications for diverse sectors.
Conduit installation guide terms to learn:
– Innerduct Installation Service Company
– conduit installation cost
– underground electrical conduit
Planning Your Conduit Installation
Before diving into the actual installation, planning your conduit route is crucial. This step ensures that your system will be efficient, safe, and compliant with regulations.
Route Planning
Start by sketching a map of your desired conduit path. This helps visualize the route and identify potential obstacles. Consider the shortest and most direct path to minimize material usage and installation time.
Tip: Use a string or laser level to mark the path on the ground or wall. This can help you see any obstacles you might have missed.
Permits
Before any installation, check with your local authorities to see if you need permits. Some areas have strict regulations, especially if you’re working in commercial or industrial settings. Getting permits ensures your work is legal and meets local safety standards.
Conduit Type Selection
Choosing the right type of conduit is essential for the safety and longevity of your installation. Here’s a quick guide:
- EMT (Electrical Metallic Tubing): Best for indoor use where it’s not exposed to harsh conditions.
- PVC Conduit: Ideal for wet or corrosive environments, like underground or outdoor installations.
- RMC (Rigid Metal Conduit): Offers excellent protection in industrial settings.
Trench Depth
For underground installations, digging the correct trench depth is vital. The National Electrical Code (NEC) provides guidelines on how deep conduits should be buried. Typically, a depth of 18-24 inches is recommended to protect against accidental damage.
Safety First
Safety cannot be overstated. Always turn off the power at the main source before starting your installation. Double-check the locations of all underground utilities to avoid accidents.
Remember: Follow NEC guidelines to ensure compliance and safety throughout the process. Wear protective gear like gloves and safety glasses to protect yourself from sharp edges and debris.
By following these steps, you’ll set a solid foundation for a successful conduit installation. Next, we’ll look at the tools and materials you’ll need to get the job done efficiently.
Tools and Materials Needed
To get started with your conduit installation guide, you’ll need a reliable set of tools and materials. These essentials will help ensure a smooth installation process and a professional finish.
Pipe Cutter
A pipe cutter is crucial for making clean and precise cuts on PVC conduit. This tool allows you to cut the conduit to the exact length needed, reducing waste and ensuring a snug fit.
Angle Grinder
For tougher materials like metal conduits, an angle grinder comes in handy. It can quickly cut through metal, making it easier to handle RMC or EMT conduits.
Hacksaw
A hacksaw is a versatile tool that can be used for cutting both PVC and metal conduits. It’s a good backup if your pipe cutter or angle grinder isn’t available.
Conduit Bender
A conduit bender is essential for creating smooth bends in the conduit. This helps in navigating around obstacles and maintaining the integrity of the wiring inside.
Heat Gun
When working with PVC, a heat gun can assist in bending the conduit without cracking. It evenly heats the PVC, allowing for flexible shaping.
Straps, Hangers, and Supports
These components are vital for securing the conduit in place. Straps and hangers keep the conduit stable, while supports ensure it stays aligned and doesn’t sag over time.
Fish Tape
Fish tape is a must-have for pulling wires through the conduit. It simplifies the process of threading wires, especially through long or complex conduit runs.
Electrical Tape
Electrical tape is used to insulate and protect wire connections. It’s also helpful for temporarily securing wires during installation.
With these tools and materials, you’ll be well-prepared to tackle your conduit installation project. In the next section, we’ll explore how to cut and prepare the conduit for installation.
Cutting and Preparing the Conduit
When it comes to installing PVC electrical conduit, the first step is cutting and preparing the conduit. This ensures that each piece fits perfectly in your planned route.
Measuring
Before making any cuts, you need to measure the conduit accurately. Use a tape measure to determine the length required for each section. Be sure to account for fittings and any bends. It’s a good idea to add a little extra length—about a few inches—just in case.
Cutting
Once you’ve measured, it’s time to cut the conduit. You can use a pipe cutter for clean, straight cuts on PVC. If you’re working with metal conduit, an angle grinder or hacksaw is more effective.
Steps for Cutting:
- Mark the cutting point on the conduit with a pencil or marker.
- Secure the conduit in place using a vise or clamp.
- Use your chosen tool to cut along the marked line, ensuring a steady hand for a straight cut.
Deburring
After cutting, you might find rough edges or burrs on the conduit. These can damage wires if left untreated. Use a deburring tool or a simple hobby knife to smooth out these edges. Run the tool gently around the inside and outside of the cut end.

Tools and Techniques
Having the right tools is crucial for efficient conduit preparation. Here’s a quick rundown of what you’ll need:
- Pipe Cutter: Ideal for PVC, ensuring smooth, burr-free cuts.
- Angle Grinder: Best for metal conduits like RMC or EMT.
- Hacksaw: A versatile option for both PVC and metal, though it may require more effort.
- Deburring Tool or Hobby Knife: Essential for smoothing cut edges.
Pro Tip: For PVC with a diameter over 2 inches, use a miter box for a square cut.
By following these steps and using the right tools, you’ll ensure that your conduit is perfectly prepared for installation. Up next, we’ll dive into bending the conduit for those tricky angles and turns.
Bending the Conduit
Once your conduit is cut and prepared, it’s time to tackle bending. Proper bending ensures your conduit fits neatly into your planned route, avoiding sharp angles that can damage wires.
Heat Gun
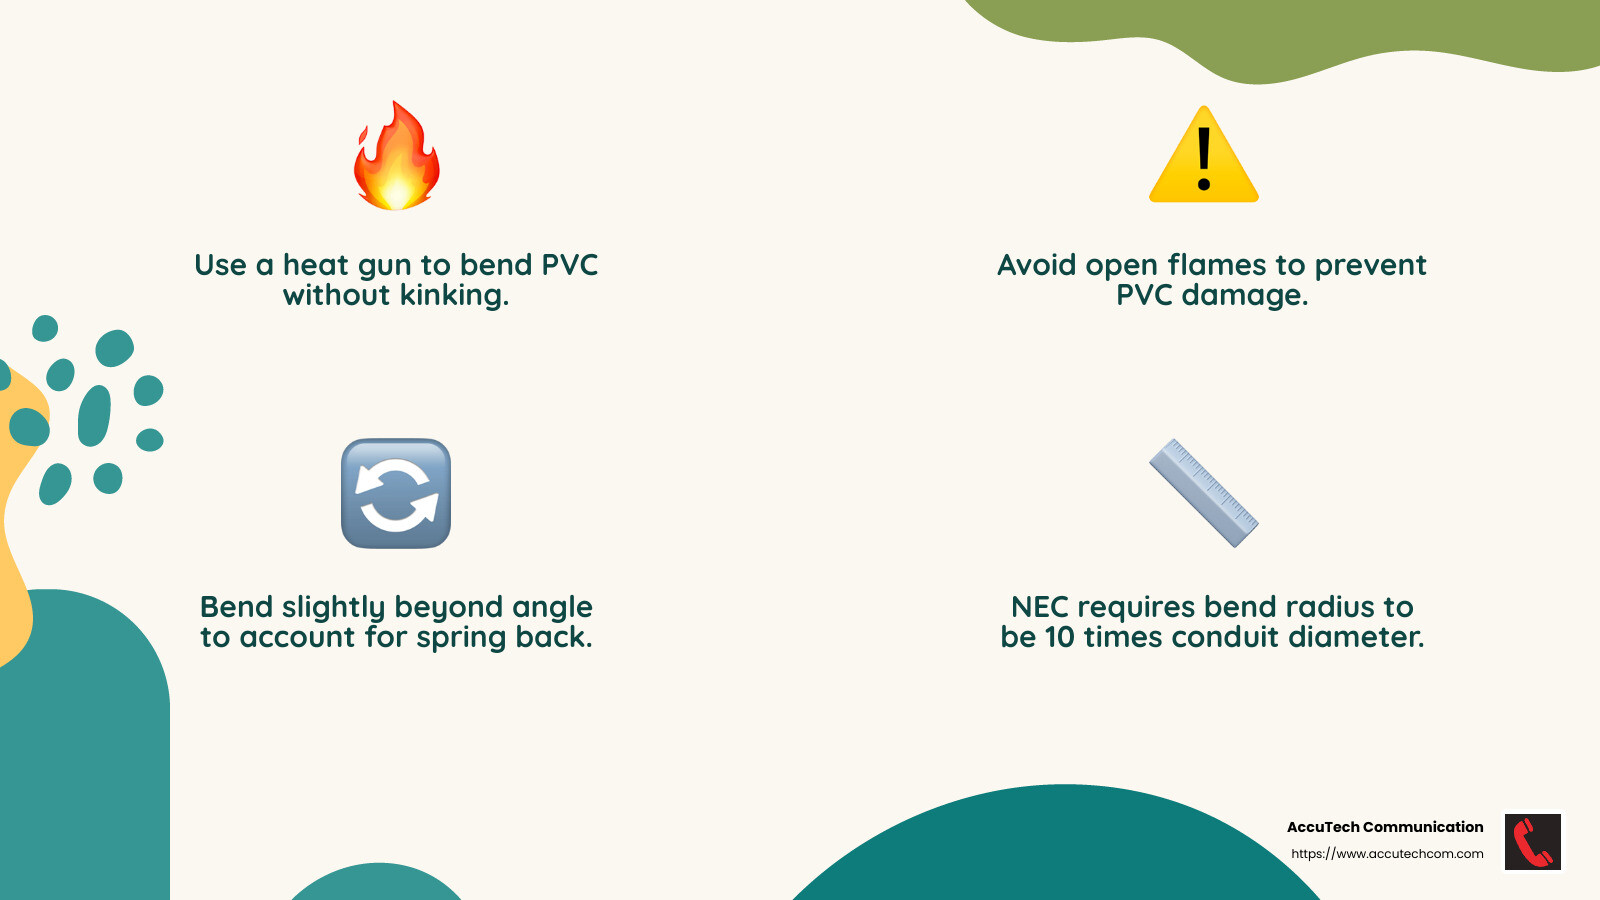
For PVC conduit, a heat gun is your best friend. It allows you to heat the conduit to make smooth bends without kinking. Avoid open flames as they can damage the PVC.
Steps for Using a Heat Gun:
- Warm the Area: Heat the section of the conduit you want to bend. Keep the heat gun moving to avoid overheating one spot.
- Check Flexibility: Once the PVC becomes flexible, you’re ready to bend.
- Bend Slightly Over: Bend slightly beyond your desired angle to account for “spring back” when cooling.
- Cool Quickly: Use water or cold air to set the bend.
Conduit Bender
For metal conduits like EMT, a conduit bender is the tool of choice. These manual benders come with marks for various angles, making it easier to achieve precise bends.
Bending Techniques:
- Stub Up: For a 90-degree bend, align the conduit with the bender’s mark and apply steady pressure.
- Offset Bend: Used to steer around obstacles. Requires two bends in opposite directions.
- Three-Point Saddle: For crossing over an obstruction with three bends—two in one direction and one in the opposite.
NEC Guidelines
When bending conduit, it’s crucial to follow the National Electrical Code (NEC) guidelines. These rules ensure safety and functionality.
- Bend Radius: The NEC specifies a minimum bend radius to prevent wire damage. For PVC, the heated length should be about 10 times the conduit diameter.
- Bend Limits: The NEC allows a maximum of 360 degrees of bends between pull points. This includes all bends, so plan your route wisely.
Pro Tip: Always measure and mark your conduit before bending. This ensures accuracy and reduces waste.
Mastering these bending techniques will help you steer complex routes smoothly. Next, we’ll explore how to install conduit fittings to keep your project on track.
Installing Conduit Fittings
Now that your conduit is bent and ready, it’s time to focus on installing conduit fittings. This step is crucial for connecting conduit sections and ensuring a secure, safe installation.
Fittings
Fittings are the connectors that join conduit sections. There are different types for various applications:
- Couplings: These join two pieces of conduit. Use setscrew couplings for dry areas and compression couplings for wet locations.
- Elbows: Pre-bent fittings for making sharp turns.
- Adapters: Connect conduit to electrical boxes or other devices.
Straps and Supports
Proper support is key to a stable conduit system. Straps and supports keep the conduit securely attached to walls or ceilings.
- Spacing: NEC guidelines recommend spacing straps no more than 10 feet apart and within 3 feet of any fitting.
- Types: Use single-hole or double-hole straps depending on the conduit size and installation surface.
Expansion Joints
Temperature changes can cause conduit to expand or contract. Expansion joints allow for this movement, preventing stress and potential damage.
- When to Use: If temperature variation exceeds 25°F, expansion joints are necessary.
- Installation: Follow the manufacturer’s instructions for proper placement and use.
Solvent Welding and Cementing
For PVC conduit, solvent welding is a common method to ensure watertight connections.
- Solvent Cement: Apply this to both the inside of the fitting and the outside of the conduit. Twist slightly while joining to spread the cement evenly.
- Curing Time: Allow adequate time for the cement to cure, especially in wet conditions—50% more time is recommended.
Tips for Success
- Check Alignment: Ensure all fittings are properly aligned before cementing.
- Tight Connections: Make sure all connections are snug to prevent gaps or looseness.
- Verify with NEC: Always check your installation against NEC guidelines to ensure compliance and safety.
By following these steps, your conduit fittings will be secure and dependable. Next, we’ll look at how to connect your conduit to electrical boxes for a complete setup.
Connecting the Conduit and Electrical Boxes
Once your conduit system is in place, the next step is to connect the conduit to electrical boxes. This is where the magic happens, as you create a seamless path for electrical wires to reach their destination.
Cement Application
Connecting conduit sections to electrical boxes requires a strong bond. Cement application is key for PVC conduit:
- Prepare Surfaces: Clean and dry the surfaces of the conduit and the box connector.
- Apply Cement: Use a solvent-based cement, applying it to the outside of the conduit and the inside of the box connector.
- Insert and Twist: Slide the conduit into the connector, twisting slightly to ensure even cement distribution.
- Curing Time: Allow the cement to cure thoroughly. In damp conditions, give it extra time—50% more than usual.
Adapter Installation
Adapters are essential for joining conduits to electrical boxes, especially when dealing with different materials or sizes:
- PVC to Metal: Use adapters that transition PVC conduit to metal boxes.
- Threaded Connections: For threaded boxes, ensure the adapter has compatible threads for a tight fit.
Wet-Site Rated Boxes
For outdoor or damp locations, it’s crucial to use wet-site rated boxes:
- Seal Tight: These boxes have built-in seals to prevent water ingress.
- Gasketed Covers: Ensure the cover has a gasket for added protection against moisture.
Flexible PVC Conduits
In areas requiring flexibility, such as around machinery or in tight spaces, flexible PVC conduits are a great option:
- Compression Fittings: Use special compression fittings designed for flexible conduits to ensure a secure connection.
- Bendability: Flexible conduits can bend without heating, making them ideal for complex routes.
By following these steps, you’ll ensure a robust connection between your conduit and electrical boxes. This sets the stage for safely running wires through your system, which we’ll cover next.
Running Wires Through the Conduit
Now that your conduit and electrical boxes are connected, it’s time to run wires through the conduit. This step is crucial for ensuring a safe and efficient electrical system.
Fish Tape
Fish tape is your best friend when pulling wires through a conduit. It’s a flexible, flat tool that helps guide wires through tight spaces.
- Inserting Fish Tape: Start by feeding the fish tape through the conduit until it reaches the other end.
- Handling Bends: If your conduit has bends, gently maneuver the fish tape to avoid getting stuck.
Wire Attachment
Once the fish tape is through, it’s time to attach the wires.
- Strip the Wires: Strip about 4 inches of insulation from each wire end.
- Loop and Secure: Loop the stripped ends through the fish tape eyelet. Secure them with electrical tape to prevent slipping.
Pulling Wires
With the wires attached, you’re ready to pull them through the conduit.
- Team Effort: Have a helper feed the wires into the conduit as you pull the fish tape from the other end.
- Steady Pulling: Apply consistent pressure to avoid wire damage. If resistance is felt, check for snags or adjust your angle.
THHN Wire
For pulling through PVC conduit, THHN wire is ideal. It’s flexible and has a low-friction coating, making it easy to maneuver.
- Flexibility: THHN wire bends easily, reducing the risk of kinks.
- Durability: Its insulation withstands the pulling process without tearing.
By following these steps, you’ll ensure that your wires are safely and efficiently installed within the conduit. This foundation is key to a reliable electrical system. Next, we’ll explore advanced installation techniques for different environments.
Advanced Installation Techniques
When installing electrical conduit, different environments require unique approaches. This section will guide you through advanced techniques for outdoor installations, marine environments, telecommunications, scientific equipment, and handling bends and couplings.
Outdoor Installation
Installing conduit outdoors involves several considerations to ensure durability and safety.
- Weatherproofing: Use weatherproof boxes and seal all connections to prevent water ingress. Consider adding drain holes to allow moisture to escape.
- Trench Depth: For underground installations, ensure trenches are deep enough to protect conduits from surface activities. Always check local regulations for minimum depth requirements.
- Material Choice: Choose PVC Schedule 80 for areas prone to physical damage. It’s thicker and offers better protection against impacts.
Marine Environments
Marine environments pose additional challenges due to saltwater exposure and humidity.
- Corrosion Resistance: Use materials specifically designed to resist corrosion. PVC is a good choice due to its non-corrosive properties.
- Secure Fastening: Ensure all conduits are securely fastened to withstand strong winds and waves. Use corrosion-resistant straps and supports.
- Regular Inspection: Periodically inspect installations for signs of wear or corrosion. Regular maintenance is key to longevity in harsh marine conditions.
Telecommunications
Telecommunications require precise and reliable conduit installations to support network integrity.
- Cable Management: Proper cable management ensures ease of maintenance and reduces interference risks. Use wide conduits to prevent cable compression.
- Structured Cabling: Follow structured cabling guidelines for efficient and organized installations. This includes proper labeling and grouping of cables.
- Redundancy: Consider redundancy solutions to ensure continuous service. This involves installing backup conduits or pathways.
Scientific Equipment
When working with scientific equipment, precision is crucial.
- Environmental Control: Ensure that conduits are installed in temperature-controlled environments to protect sensitive equipment.
- Minimize Interference: Use shielded cables and conduits to prevent electromagnetic interference that could affect sensitive instruments.
- Flexible Conduits: Consider using flexible PVC conduits for installations requiring frequent modifications or equipment repositioning.
Bends and Couplings
Handling bends and couplings correctly is vital for a smooth conduit installation.
- Minimize Bends: Keep bends to a minimum to ease wire pulling and reduce stress on cables. The National Electrical Code (NEC) recommends no more than 360 degrees of bends between pull points.
- Use Fittings: Use elbows and other fittings for sharp turns. This prevents kinks and maintains cable integrity.
- Expansion Joints: In areas subject to temperature changes, use expansion joints to accommodate thermal expansion and contraction.
By applying these advanced techniques, you can adapt your conduit installation guide to suit various environments and requirements. This ensures a safe, efficient, and long-lasting electrical system. Up next, we’ll tackle common mistakes and troubleshooting tips to help you avoid pitfalls during installation.
Common Mistakes and Troubleshooting
Even with careful planning, issues can arise during conduit installation. Here’s how to tackle common mistakes and ensure a smooth process.
Conduit Jams
Conduit jams can be frustrating, but they’re preventable. They often occur when wires snag on rough edges or tight bends.
- Deburring: After cutting the conduit, use a deburring tool to smooth out sharp edges. This prevents damage to wire insulation and reduces the risk of jams.
- Lubrication: Apply wire-pulling lubricant to the wires. This reduces friction, making it easier to pull wires through the conduit.
- Fish Tape: Use fish tape to guide wires through long or complex runs. Attach the wire to the fish tape’s eyelet and pull gently but firmly.
- Pulling Elbows: If the conduit has more than three turns, install pulling elbows. These provide access points to pull wires through without excessive force.
NEC Compliance
Compliance with the National Electrical Code (NEC) ensures safety and legality.
- Strap Spacing: Secure the conduit with straps no more than 10 feet apart and within three feet of any coupling or fitting.
- Conduit Fill: Avoid overcrowding. Follow NEC guidelines to determine the maximum number of wires for each conduit size and type.
- GFCI: Regularly test ground fault circuit interrupters (GFCI) to ensure they function correctly. This is crucial for safety in damp or wet locations.
Troubleshooting Tips
If you encounter issues, here are some tips to get back on track:
- Check Connections: Loose connections can cause problems. Tighten any that are loose to maintain electrical continuity.
- Inspect for Damage: Look for signs of wear, corrosion, or damage, especially in outdoor installations exposed to the elements.
- Clear Blockages: Use fish tape to clear any debris or obstructions inside the conduit.
By understanding these common mistakes and troubleshooting tips, you can ensure a successful conduit installation. Next, we’ll address frequently asked questions to further improve your understanding of the conduit installation guide.
Frequently Asked Questions about Conduit Installation Guide
How Many Wires Can I Run Through a Conduit?
The number of wires you can run through a conduit depends on both the conduit size and the type of wire you’re using. According to the National Electrical Code (NEC) guidelines, it’s important to avoid overcrowding to prevent overheating.
- 1/2-inch conduit: Typically holds up to five wires.
- 3/4-inch conduit: Can accommodate more wires, but always check the fill capacity specific to your wire type.
Why is this important? Overfilling a conduit can lead to overheating, which is not only dangerous but also against NEC code. Always ensure your installation complies with these guidelines for safety and efficiency.
What is the Maximum Number of Bends Allowed?
When installing conduit, it’s crucial to limit the number of bends to ensure easy wire pulling and maintain compliance with NEC rules.
- 360 Degrees: The NEC specifies that the total amount of bends between pull points should not exceed 360 degrees. This means you can have up to four 90-degree bends in one run without a junction box.
- Pull Points and Junction Boxes: If more bends are needed, incorporate a junction box. This breaks up the run, making it easier to pull wires through and ensuring compliance.
Tip: Planning your route to minimize bends can save time and effort during installation.
How Do I Waterproof Outdoor Conduit Installations?
Waterproofing outdoor conduit installations is essential to protect against moisture and ensure long-term durability.
- Weatherproof Boxes: Use weatherproof electrical boxes with threaded knockout holes for a secure, water-resistant connection.
- Seal Connections: Apply appropriate sealants and gaskets at all connection points to prevent water ingress.
- Drain Holes: Drill a 1/4-inch hole at the bottom of the box to allow any accumulated water to escape. This helps prevent damage from trapped moisture.
- PVC Conduit: For outdoor use, opt for PVC conduit due to its resistance to moisture and corrosion. Ensure it’s rated for outdoor applications.
By following these steps, you can maintain the safety and longevity of your outdoor conduit installations. These precautions help protect your electrical system from the elements, ensuring reliable performance.
Next, we’ll explore advanced installation techniques for different environments to further improve your conduit installation skills.
Conclusion
Review
In this conduit installation guide, we’ve covered everything from planning to execution. By following these steps, you ensure not only a successful installation but also compliance with safety standards. The right tools and materials, careful planning, and adherence to NEC guidelines are crucial for both safety and efficiency. From measuring and cutting to bending and fitting, each stage plays a vital role in the overall success of the installation.
Maintenance Tips
Regular maintenance is key to keeping your conduit system in top shape. Here are some essential tips:
- Inspect Regularly: Look for signs of wear, corrosion, or damage. Outdoor conduits are especially vulnerable to water ingress and UV damage.
- Clean and Clear: Ensure conduits are free from debris and blockages. Use fish tape to clear any obstructions.
- Tighten Connections: Over time, fittings can loosen. Regularly check and tighten connections to maintain safety and continuity.
- Test GFCI Protectors: Regularly test Ground Fault Circuit Interrupters (GFCI) to ensure they’re functioning properly. This is especially important in areas prone to moisture.
By incorporating these maintenance practices, you can extend the life of your conduit system and prevent costly repairs.
AccuTech Communications
At AccuTech Communications, we understand the importance of a reliable electrical system. With over two decades of experience in network cabling and electrical conduit installations, we are committed to providing high-quality services custom to your needs. Whether you need a new installation or an upgrade, our skilled technicians ensure your systems meet the highest standards.
Ready to improve your business communication infrastructure? Contact us today for reliable and affordable solutions. Your network is the backbone of your business—let us help you make it stronger.
