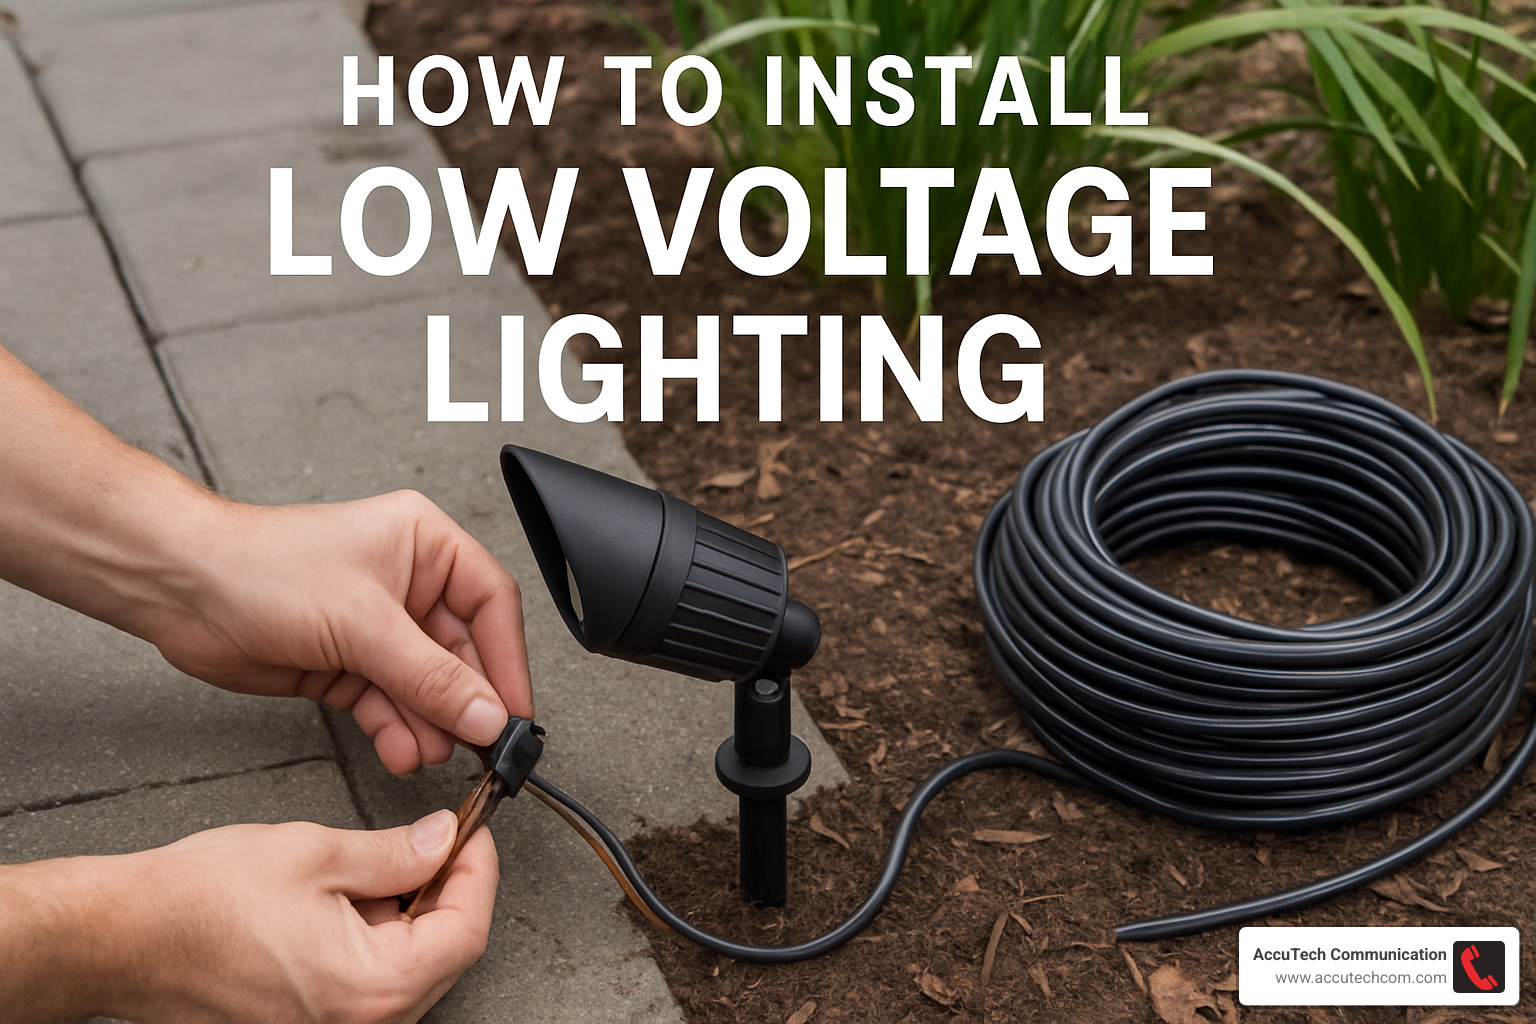
How to Install Low Voltage Lighting: 7 Essential Tips 2025
Why Low Voltage Lighting is the Smart Choice for Your Property
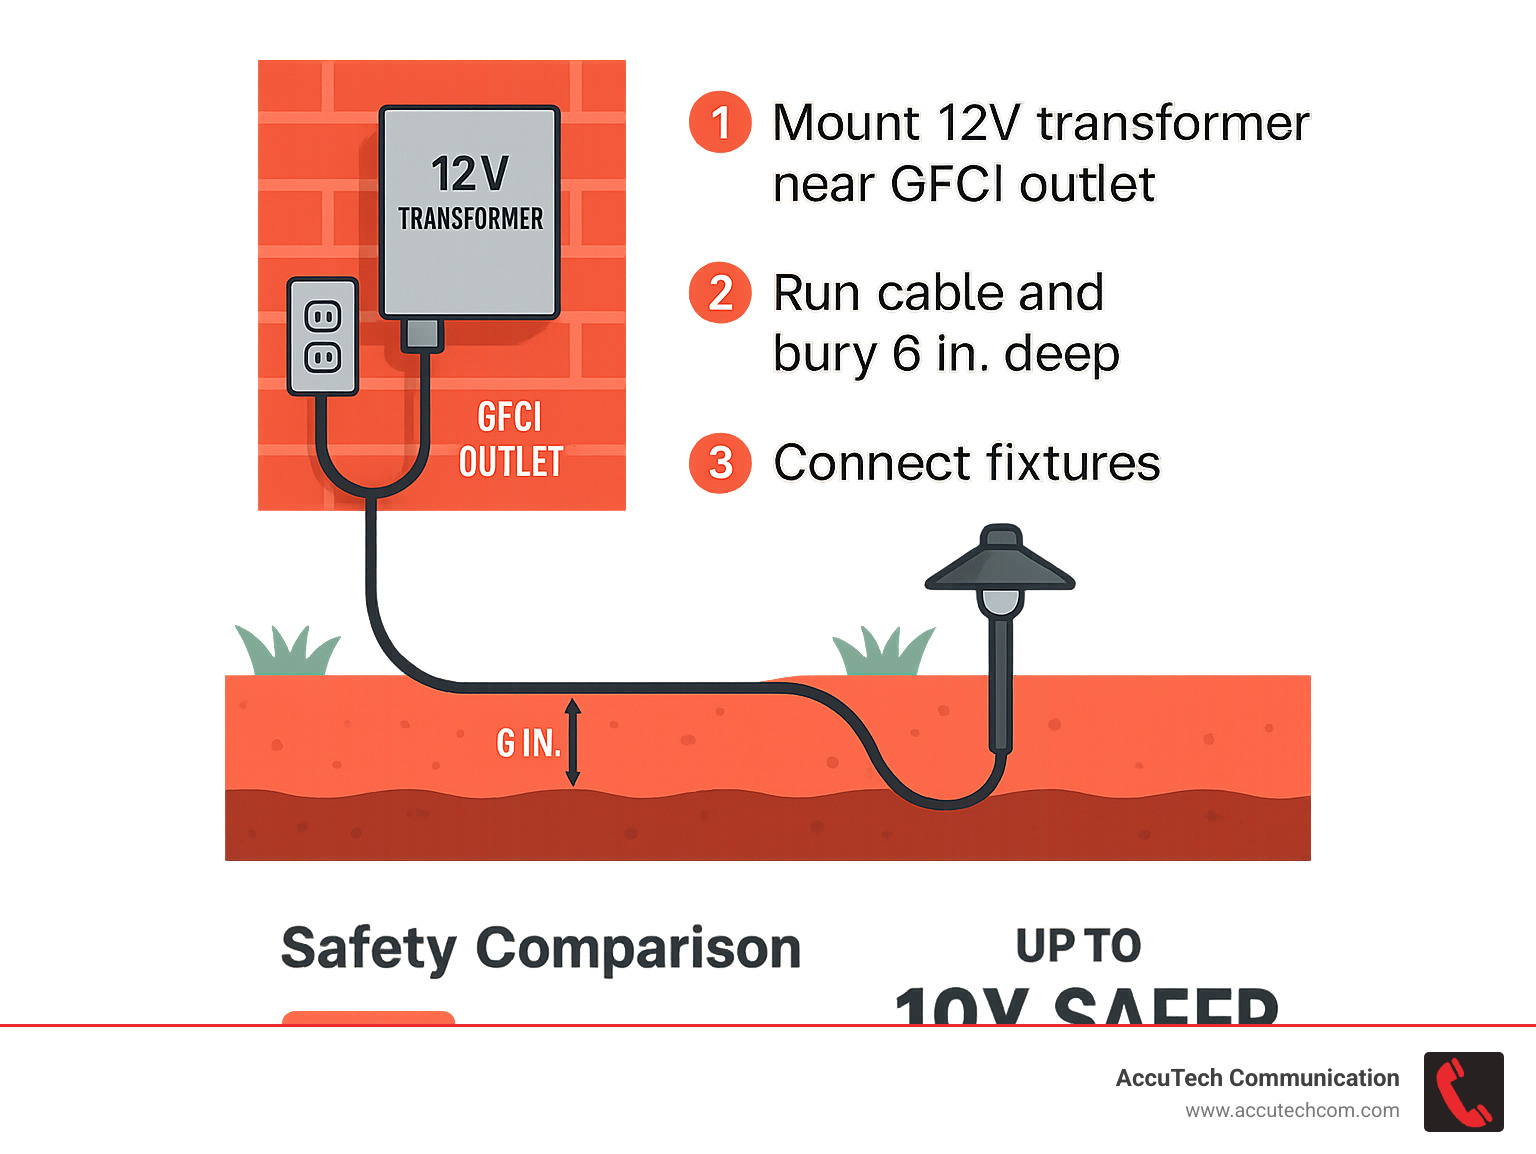
How to install low voltage lighting is surprisingly straightforward – and much safer than you might think. Here’s the basic process:
- Plan your layout and calculate total fixture wattage
- Mount a 12V transformer near a GFCI outlet
- Run low-voltage cable to fixture locations
- Connect fixtures using quick-connect or splice methods
- Bury cable at least 6 inches deep
- Test and adjust fixture positioning at night
Low voltage lighting systems operate at just 12 volts instead of your home’s standard 120 volts. This makes them up to 10 times safer to install and handle. A transformer steps down the voltage, so you can work with the wiring while it’s energized without risk of serious shock.
The safety benefits are huge for DIY installation. As one lighting expert puts it: “Installing low-voltage landscape lighting is an easy do-it-yourself project that most homeowners can complete.”
These systems also slash energy consumption by up to 80% compared to line voltage lighting. Most homeowners can complete a basic installation in 4-8 hours for around $275 in materials.
Why choose low voltage over standard lighting?
- Safer installation – 12V vs 120V means minimal shock risk
- Energy efficient – LED fixtures use 80% less power
- Flexible placement – No conduit required for cable burial
- Easy expansion – Add fixtures without major rewiring
- Code friendly – Simpler electrical requirements
I’m Corin Dolan, owner of AccuTech Communications, and I’ve been installing low-voltage systems for businesses across Massachusetts, New Hampshire, and Rhode Island since 1993. While we typically focus on commercial network cabling and communication systems, the principles of how to install low voltage lighting are very similar to the structured cabling work we do daily.
Low Voltage Lighting 101: How It Works & Why Choose It
What is Low Voltage Lighting?
Your home’s electrical system runs at 120 volts – enough power to give you a serious shock. Low voltage lighting operates at just 12 volts, making it as gentle as a car battery.
A transformer acts like a translator between your home’s high-voltage power and the gentle current your landscape lights need. Just like your phone charger steps down wall power, a lighting transformer converts dangerous 120V into manageable 12V secondary circuit.
This current conversion happens separately from your home’s main electrical system. Most transformers handle between 100 and 300 watts, plenty to light up your entire yard.
Key Benefits over Line Voltage Systems
Safety becomes a non-issue when working with 12 volts instead of 120. You’re literally 10 times safer than with line voltage systems. You could actually touch live low voltage wires without getting shocked.
Energy savings are significant. Modern LED fixtures can slash your outdoor lighting energy consumption by 80% compared to traditional systems.
The installation flexibility is a game-changer. Forget running conduit or dealing with complex electrical codes. Low voltage cable goes right in the ground with just 6 inches of dirt on top. No permits, no inspections, no headaches.
Easy expansion means you’re not locked into your original design. Next spring when you decide those shrubs need accent lighting, just check if your transformer has spare capacity and splice in new fixtures.
Main Components You’ll Need
The transformer is your system’s heart – it handles voltage conversion and often includes built-in timer options or photo sensors for automatic operation.
Your fixtures need to be specifically designed for 12V operation. LED options dominate the market because they’re incredibly efficient and last for years.
Cable selection typically comes down to 12/2 or 14/2 low voltage wire rated for direct burial. Heavier gauge handles longer runs without voltage drop issues.
Connectors keep your connections solid through seasons of weather. Weatherproof wire nuts, quick-connects, or splice connectors are essential.
Smart additions like timers, photo sensors, and weatherproof covers take your system from basic to brilliant. Following Scientific research on electrical safety guidelines ensures your installation meets NEC code standards.
Planning Your Project Like a Pro
The difference between a stunning lighting installation and a frustrating mess comes down to planning. A little upfront planning saves hours of headaches later.
Mapping the Layout and Zones
Take an evening stroll around your property at dusk, when you can see exactly where shadows fall and which areas feel unsafe or uninviting.
Identify your pathways and walkways for safety lighting. Look for accent opportunities like beautiful trees or stone walls that could use dramatic uplighting. Don’t forget focal points like your front entrance, mailbox, or water features.
Use small flags to mark each potential fixture location. Then measure distances between fixtures and back to where you’ll mount the transformer. This prevents buying 100 feet of cable when you actually need 175 feet.
For larger properties, consider separate lighting zones. Sometimes two smaller transformers work better than trying to snake cable under driveways. More info about cabling installation techniques can help with complex routing challenges.
Choosing the Right Transformer
Add up all your planned fixtures – if you’re installing ten 7-watt LED path lights, that’s 70 watts total. Multiply by 1.25 for safety headroom (70 × 1.25 = 87.5 watts), and choose the next available transformer size.
This capacity headroom isn’t just cautious – it’s smart planning. Transformers run cooler and last longer when not maxed out. Plus, you’ll have room to add fixtures next season.
Most quality transformers come with timer options, photo sensors, or both. I recommend timers over photo sensors because they give consistent performance.
Selecting Cable Type & Gauge
The relationship between wire gauge and run length is where many DIY projects go wrong. Thicker wire (lower gauge numbers) carries power farther without voltage drop, but costs more.
12-gauge cable handles the longest runs and highest loads. 14-gauge wire works great for most residential projects with moderate distances. 16-gauge cable is fine for short runs with just a few low-wattage fixtures.
Always choose direct-burial rated cable with UV-resistant jacketing. Check voltage drop charts that come with your transformer to match wire gauge to your specific run length and load.
Wiring Methods Explained
Straight-run wiring is simplest – one cable from transformer to the end of your run, with fixtures connected along the way. Works great for shorter runs but can cause dim lights at the far end.
Loop circuits solve voltage drop by running cable out to fixtures and back to the transformer. This keeps distant lights bright and provides backup power paths.
The hub method works when fixtures cluster in different areas. Run multiple shorter cables from a central junction point rather than one super-long run.
| Wiring Method | Best For | Voltage Drop | Installation Complexity |
|---|---|---|---|
| Straight-run | Short runs under 100 feet | Higher on long runs | Simplest |
| Loop circuit | Long runs, high wattage | Minimal | Moderate |
| Hub method | Multiple fixture clusters | Low | Most complex |
How to Install Low Voltage Lighting: Step-By-Step Guide
Ready to transform your outdoor space? How to install low voltage lighting becomes much easier when you have the right tools and approach.
Gather these essential tools: wire strippers, electrical tape, a shovel or trenching tool, drill with bits for mounting, and a voltage tester. You’ll also need stakes for marking your cable routes.
The most important requirement is having a GFCI-protected outlet within reach of your transformer location. If you don’t have one nearby, this might be the only part where you’ll want to call an electrician.
For businesses needing more complex installations, we at AccuTech Communications handle cabling installation projects throughout Massachusetts, New Hampshire, and Rhode Island.
How to Install Low Voltage Lighting Safely – Prep & Protection
Call 811 before any digging – it’s free, it’s the law, and it could save your life. Underground utilities aren’t always where you’d expect.
Turn off the circuit breaker that feeds your outdoor outlet before wiring the transformer. The low-voltage side is safe, but the transformer’s input still carries dangerous 120V current.
Wear safety glasses when drilling and gather all materials before starting. Read through manufacturer’s instructions completely.
Step 2 – Mount and Wire the Transformer
Your transformer needs mounting at least 12 inches above ground and within 30 feet of water features to meet electrical codes. Near your house’s foundation usually works perfectly.
The transformer needs breathing room for heat dissipation, so maintain at least 1 foot of clearance on all sides. For brick or masonry mounting, use appropriate anchors. For siding, special clips let you hang transformers without drilling holes.
Strip about 3/4 inch of insulation from your main cable conductors and connect them to the transformer’s A and B terminals. Unlike household wiring, low voltage systems have no polarity requirements – either wire can go to either terminal.
Step 3 – Lay Out Cable & Position Fixtures
Before digging, lay out your entire system above ground. This “dry run” approach saves countless headaches and prevents coming up short on cable length.
Run your main cable along the planned route and position fixtures exactly where you marked them. Leave about 18 inches of slack at each fixture location for easier connections and future adjustments.
For path lighting, space fixtures 8-10 feet apart for even illumination when using 20-watt fixtures.
Step 4 – Connect Fixtures Using Quick-Connects
Modern low voltage systems use quick-connect hardware with sharp prongs that pierce through cable insulation to make contact with conductors inside – no wire stripping required.
Place your main cable in the connector’s groove, position the fixture’s pigtail wire in the other groove, and snap the connector closed. The built-in gel seal provides weatherproof protection.
For more permanent installations, you can use traditional wire nuts wrapped with electrical tape, or heat-shrink butt connectors.
Step 5 – Bury or Conceal the Cable Safely
Low voltage cable typically needs burial at least 6 inches deep, though local codes might differ. In mulched landscape beds, you can often get away with 3-4 inches if mulch provides additional protection.
Dig a narrow trench using a square-blade shovel, creating a clean V-shaped groove. Lay cable in the bottom and backfill carefully to avoid nicking the insulation. For areas where digging isn’t possible – like under walkways – run cable through PVC conduit for protection.
Mark your cable locations on a simple sketch for future reference.
Step 6 – Program Timers, Photo Sensors & Smart Controls
Most transformers include either timer controls or photo sensors for automatic operation. We recommend timers because they provide consistent on/off times and won’t false-trigger from shadows or cloudy weather.
Set your timer for desired operating hours – typically dusk to around 11 PM for accent lighting, or all night for security applications.
For smart home integration, consider Wi-Fi enabled transformers or smart outlet plugs that let you control lights remotely via smartphone apps.
How to Install Low Voltage Lighting — Final Testing & Adjustments
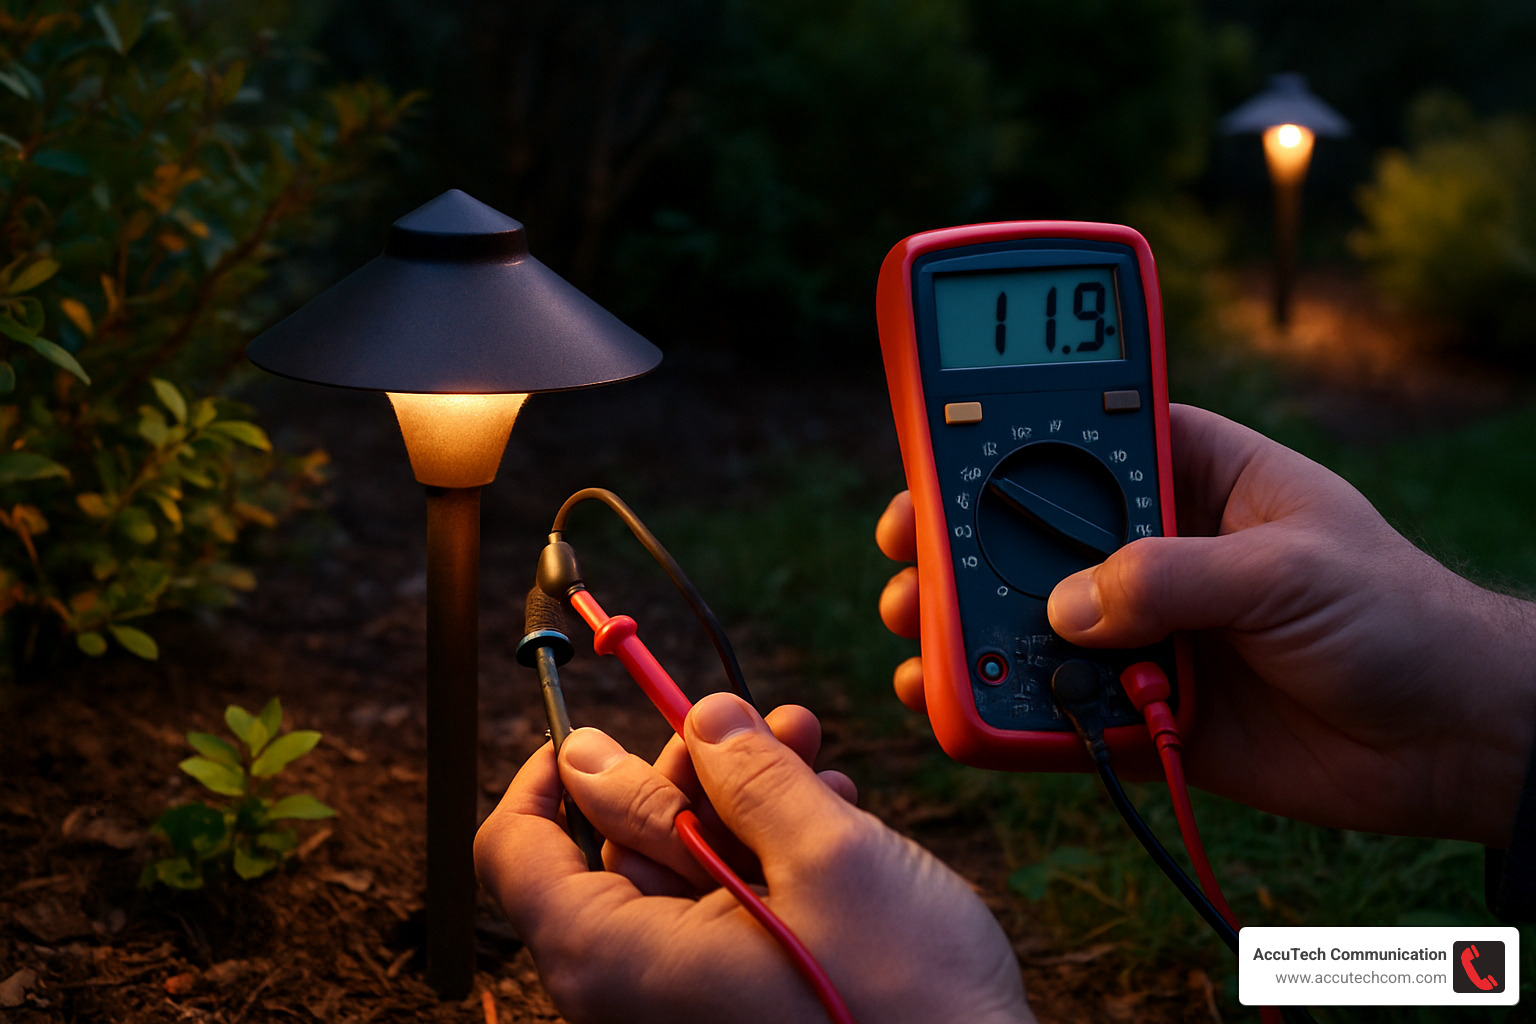
Turn on your transformer and verify that each fixture lights up. Walk the entire system at night to check for proper illumination and adjust fixture angles as needed.
Use your multimeter to check voltage at each fixture – you should see 10.5-12 volts for optimal LED performance. Significantly lower readings indicate voltage drop issues that might require heavier gauge wire.
Make final adjustments to fixture positioning and beam angles. Path lights should illuminate the walking surface without creating glare. Accent lights should highlight landscaping features without creating harsh shadows.
Troubleshooting, Maintenance & Common Mistakes
Even well-planned installations sometimes have hiccups. Here’s how to diagnose and fix the most common issues.
Quick Troubleshooting Checklist
Lights won’t turn on:
– Check if GFCI outlet has tripped
– Verify transformer is plugged in and switched on
– Test voltage at transformer output terminals
– Look for loose connections at fixtures
Some lights are dim:
– Measure voltage at dim fixtures (should be 10.5-12V)
– Check for loose or corroded connections
– Consider voltage drop from long cable runs
– Verify transformer isn’t overloaded
Lights flicker or turn on/off randomly:
– Clean photo sensor if equipped
– Check all wire connections are tight
– Look for damaged cable from digging or lawn equipment
Routine Care for Long-Lasting Performance
Low voltage lighting systems need minimal maintenance, but a little attention goes a long way:
Annually:
– Clean fixture lenses and remove debris
– Tighten any loose stakes or mounting hardware
– Check and tighten all wire connections
– Adjust timer settings for daylight saving time
As needed:
– Replace burned-out bulbs promptly
– Trim vegetation that blocks fixtures
– Re-aim lights that have shifted over time
LED fixtures typically last 25,000-50,000 hours, so bulb replacement is rare compared to older halogen systems.
Mistakes Beginners Should Avoid
Learning from others’ mistakes saves time and frustration:
Overloading the transformer: Always calculate total wattage and add 25% headroom. An overloaded transformer will cause dim lights and premature failure.
Shallow cable burial: Bury cable at least 6 inches deep to prevent damage from foot traffic or garden tools. Mark cable routes on a sketch.
Skipping the night test: Never bury cables until you’ve tested the entire system after dark. It’s much easier to make adjustments with everything still exposed.
Mismatched components: Stick with one manufacturer’s system when possible. Mixing different brands can cause compatibility issues with connectors and voltage requirements.
Poor planning: Measure twice, dig once. Careful planning prevents expensive do-overs and ensures you have enough materials.
Budget, Expansion & Smart Upgrades
Understanding the real costs helps you make smart decisions about your lighting investment. How to install low voltage lighting doesn’t have to break the bank.
Cost Breakdown & Money-Saving Tips
A typical DIY low voltage lighting project runs around $275 for basic materials, but varies depending on your choices.
The transformer will be your biggest single expense, ranging from budget-friendly options with basic timers to feature-rich models with smart controls. Your fixture choices make the biggest impact on total cost – you might spend as little as $15 for basic path lights or splurge on architectural-grade fixtures.
Cable costs add up quickly on larger properties. Expect to pay more per foot for heavier 12-gauge wire, but it’s often worth it for longer runs. Don’t forget connectors and mounting hardware – quality weatherproof connections prevent headaches later.
Smart shopping can stretch your budget. Fixture multipacks often offer better value than buying individually. For large projects, renting trenching tools beats hand-digging. Consider starting with essential safety lighting, then expanding to accent lighting as budget allows.
LED fixtures cost more upfront but slash energy bills and last decades.
Planning for Future Add-Ons
Always plan for growth. Size your initial transformer with 25-50% spare capacity – you’ll find more spots that need lighting once you see how great the first phase looks.
Document everything as you go. Sketch your wire routes and take photos before burying cables. Leave extra cable coiled at junction points where you might add fixtures later.
Consider running spare cable to areas where you might expand eventually. Running an extra wire to that back garden bed costs almost nothing now but saves a whole trenching project later. Our experience with More info about structured cabling services has taught us that thinking ahead during initial installation always pays off.
Quick-splice connectors make adding new fixtures a breeze.
Integrating Smart Home Controls
The smart home revolution has reached outdoor lighting. You don’t need to rewire everything – simple additions can bring your lighting into the 21st century.
Wi-Fi smart plugs are the easiest entry point. Plug your transformer into a smart outlet, and suddenly you can control everything from your phone. Set schedules, create lighting scenes for parties, or turn lights on remotely when traveling.
For the tech-savvy, Zigbee mesh networks offer more sophisticated control. Some manufacturers make fixtures with built-in Zigbee radios. You can dim individual lights, create zones, or coordinate with other smart home devices.
Voice control integration means you can tell Alexa or Google to turn on the garden lights while carrying groceries. Seasonal programming automatically adjusts your lighting schedule as daylight hours change throughout the year.
The beauty of smart controls is you can start simple and add features over time. Begin with basic scheduling, then layer on voice control or advanced automation.
For businesses looking at larger-scale installations, our team at AccuTech Communications brings decades of experience with More info about structured cable systems that can integrate lighting controls with broader facility management systems.
Frequently Asked Questions about How to Install Low Voltage Lighting
After helping hundreds of businesses with low-voltage installations over the years, I’ve heard these same questions countless times. Let me share the answers that will save you time and potential headaches.
How deep do I need to bury low-voltage cable?
The magic number is 6 inches deep for most residential installations. This depth protects your cable from lawn mowers, garden tools, and foot traffic while meeting most local electrical codes.
Here’s where it gets interesting though – if you’re running cable through established landscape beds that stay covered with mulch, you can often get away with 3-4 inches of burial depth. The mulch provides additional protection, and you’re less likely to be digging aggressively in these areas.
Always call 811 before you dig – this free service marks underground utilities and can prevent dangerous (and expensive) accidents. Some areas have specific requirements for low voltage burial depths, so a quick call to your local building department never hurts.
For areas where you can’t dig deep enough – like under walkways or near tree roots – run your cable through PVC conduit for extra protection. It’s a small investment that prevents major repair headaches later.
What wire gauge should I use for a 150-foot run?
For a 150-foot cable run, 12-gauge wire is your best friend. While 14-gauge might technically work for lighter loads under 100 watts, 12-gauge gives you much better voltage performance and room for future expansion.
Think of wire gauge like a garden hose – thicker wire (lower gauge number) carries electrical current more efficiently over long distances. With 12-gauge cable on a 150-foot run, you’ll maintain proper voltage even with higher wattage fixtures or if you decide to add more lights later.
The voltage drop calculation matters here. At 150 feet, 14-gauge wire starts showing noticeable voltage drop, especially with multiple fixtures. Your lights at the end of the run will be dimmer than those near the transformer. 12-gauge wire minimizes this voltage drop and keeps all your fixtures burning bright and evenly.
From our experience installing structured cabling systems, spending a bit more upfront on proper wire gauge saves countless service calls and frustrated customers down the road.
Can I mix LED and halogen fixtures on the same transformer?
Absolutely! You can mix LED and halogen fixtures on the same 12V AC transformer without any compatibility issues. Both fixture types run happily on the same voltage, and your transformer doesn’t care what kind of bulbs it’s powering.
The key is calculating your total wattage carefully. A single halogen fixture might draw 20-35 watts, while an equivalent LED fixture uses only 3-7 watts. This massive difference means you could run five LED fixtures for the same power consumption as one halogen.
Here’s a real-world example: if you have five existing halogen path lights at 20 watts each (100 watts total) and want to add three LED accent lights at 5 watts each (15 watts), your total load becomes 115 watts. Make sure your transformer can handle this combined load plus the 25% safety margin we always recommend.
LED fixtures are definitely the smarter long-term choice – they last 10 times longer than halogens, generate almost no heat, and slash your energy costs. But if you already have some halogen fixtures you love, there’s no reason you can’t mix and match while gradually transitioning to LED.
Just remember to recalculate your transformer capacity whenever you change fixture types, since the wattage requirements can be dramatically different.
Conclusion
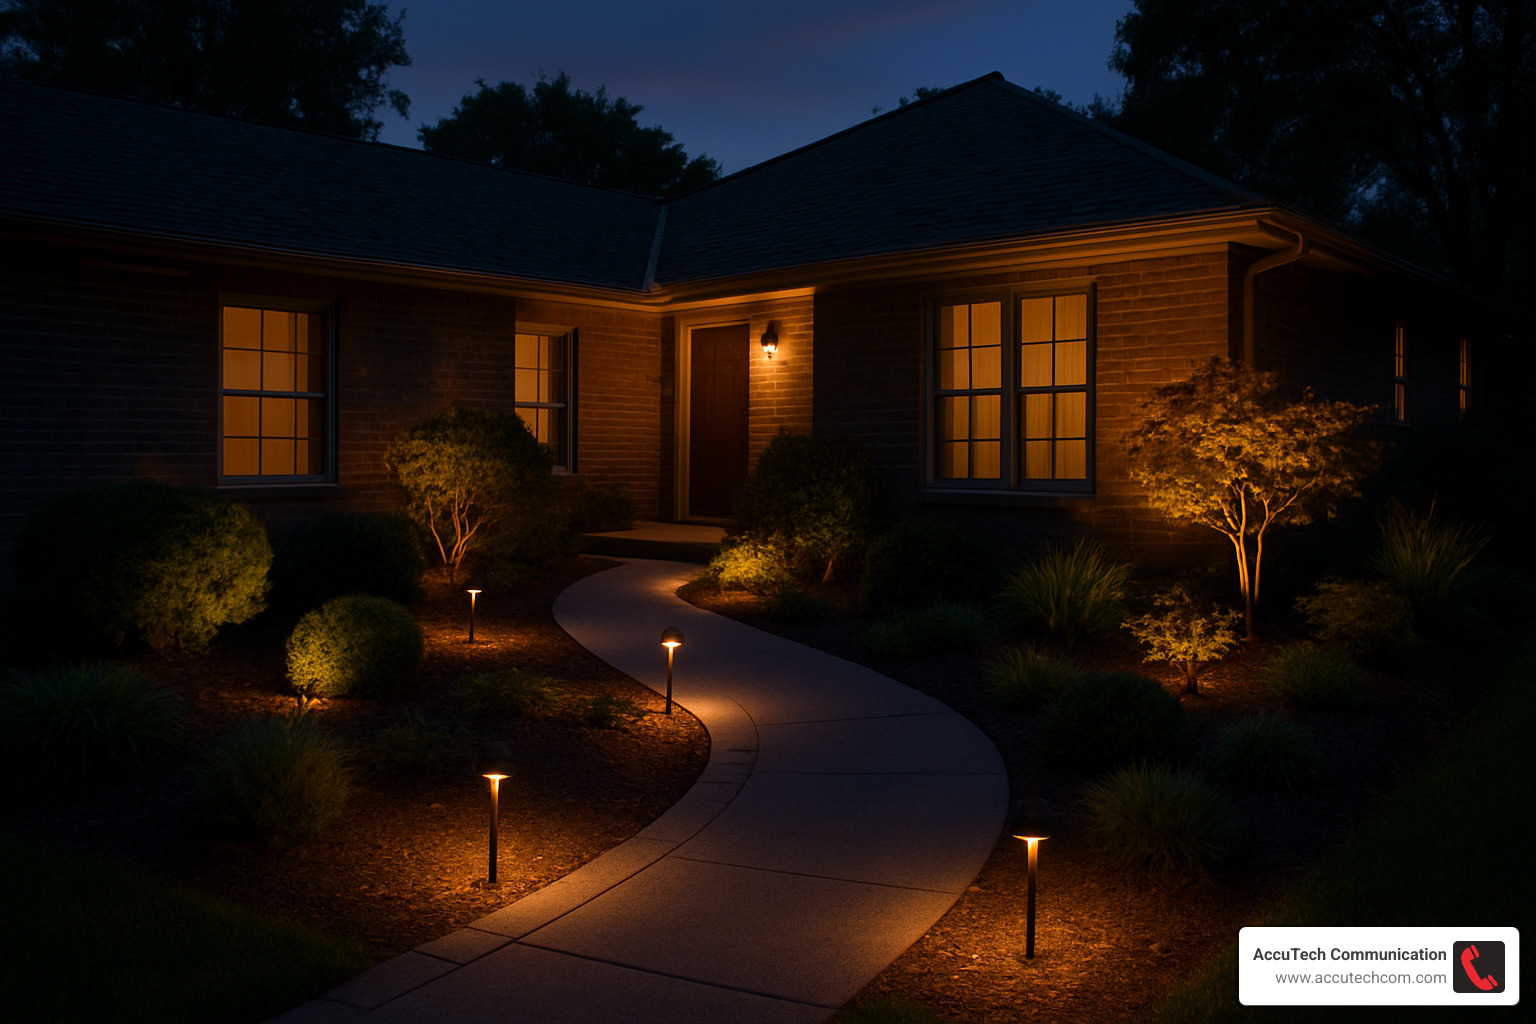
There’s nothing quite like stepping back and watching your landscape transform as the sun sets. When those carefully planned lights flicker on for the first time, you’ll feel that surge of DIY pride that comes from a job well done.
You now have everything you need to tackle how to install low voltage lighting with confidence. The beauty of these systems lies in their forgiving nature – they’re safe to work with, energy-efficient to operate, and flexible enough to grow with your vision.
Remember the golden rules: plan thoroughly before you dig, size your transformer with room to spare, and test everything before burying those cables.
Your finished project will create safer outdoor spaces where family and friends can steer your property confidently after dark. The gentle landscape glow creates an inviting atmosphere that extends your living space well into the evening hours.
At AccuTech Communications, we’ve been perfecting low-voltage installations across Massachusetts, New Hampshire, and Rhode Island since 1993. While our focus is typically on business-grade More info about structured cable systems for commercial clients, the fundamentals remain remarkably similar. Success comes down to careful planning, quality materials, and attention to detail.
Start small if this is your first lighting project. A simple pathway or a few accent lights around your front entrance builds confidence without overwhelming your weekend. Once you see how straightforward the process really is, you’ll probably find yourself sketching plans for the next phase.
Don’t be surprised when neighbors start asking questions about your beautiful lighting setup. You might just become the go-to lighting expert on your street!
