Security Camera Installations: 5 Expert Tips for Success
Security camera installations have become a pivotal component in ensuring both home and business security. The need for surveillance systems is more prevalent than ever, with technological advancements making them accessible and effective in safeguarding properties. Whether it’s for monitoring your home’s entry points or a business’s critical areas, security camera installations offer a viable solution to deter threats and document events. Here are some key points to consider:
- Determine the type of property you want to protect
- Consider the number of cameras and their placement
- Choose between wired and wireless systems
- Factor in your budget and installation preferences
My name is Corin Dolan, and I bring over two decades of experience in security camera installations. At AccuTech Communications, our work spans from small residential installs to complex business systems. As we dive deeper, let’s explore how these installations can meet your specific needs.
Understanding Security Camera Installations
When it comes to security camera installations, one size does not fit all. The complexity of the installation can vary significantly depending on several factors, such as the type of system you choose and whether you opt for a DIY approach or professional help.
Installation Complexity
Security camera installations can range from simple to complex. For a straightforward setup, you might only need a couple of cameras to cover key entry points. However, more comprehensive systems, especially those covering large properties or businesses, can be much more intricate. These may involve multiple cameras, advanced features, and extensive wiring.
Key factors affecting complexity:
- Property size and layout
- Number of cameras needed
- Type of system (wired vs wireless)
- Desired features (e.g., night vision, remote access)
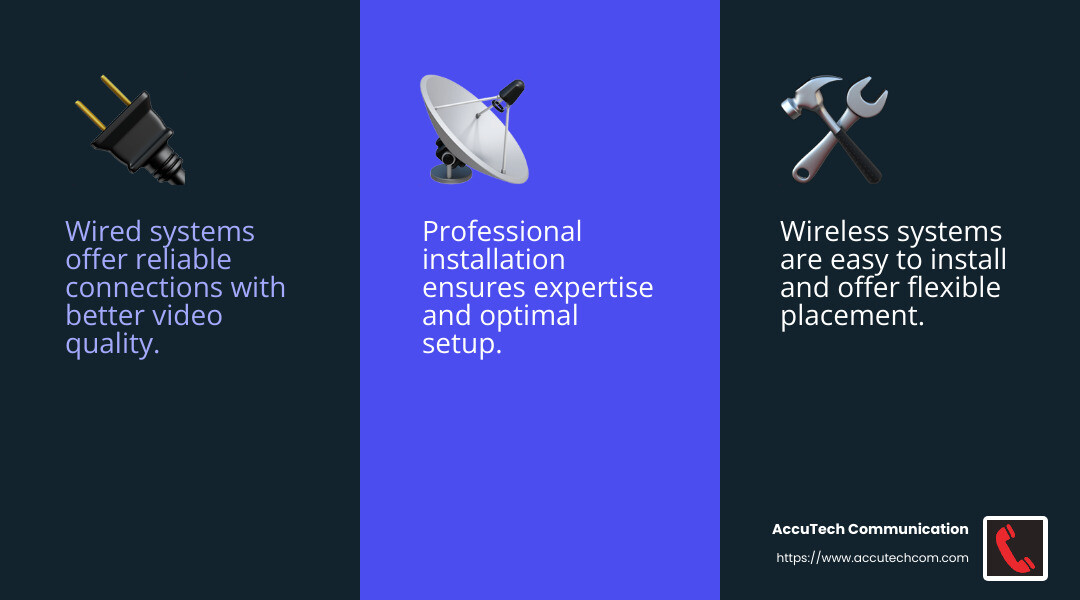
Wired vs Wireless Systems
Choosing between wired and wireless systems is a critical decision in the installation process.
Wired Systems:
- Pros: Reliable connection, often better video quality, no need to worry about battery life.
- Cons: More complex installation, requiring drilling and running cables through walls. This might need professional help, especially for large properties.
Wireless Systems:
- Pros: Easier to install, flexible placement, minimal drilling required.
- Cons: May suffer from signal interference, dependent on Wi-Fi strength, potential security vulnerabilities.
DIY vs Professional Installation
The choice between DIY and professional installation depends on your comfort level and the complexity of the system.
DIY Installation:
- Ideal for: Simple setups, small properties, or if you’re tech-savvy.
- Pros: Cost-effective, flexible timing, and a sense of accomplishment.
- Cons: Potential for mistakes, lack of professional expertise, and time-consuming.
Professional Installation:
- Ideal for: Large or complex systems, wired setups, or if you prefer hassle-free installation.
- Pros: Expertise and experience, ensures optimal setup and performance, time-saving.
- Cons: Higher cost, scheduling constraints.
In summary, understanding the intricacies of security camera installations is crucial to ensure you choose the right system and installation method for your needs. Whether you decide on a DIY project or hire professionals, the goal is to create a secure and reliable surveillance system custom to your specific requirements.
Next, we’ll dig into a step-by-step guide to installing security cameras, covering everything from selecting the perfect location to viewing footage effectively.
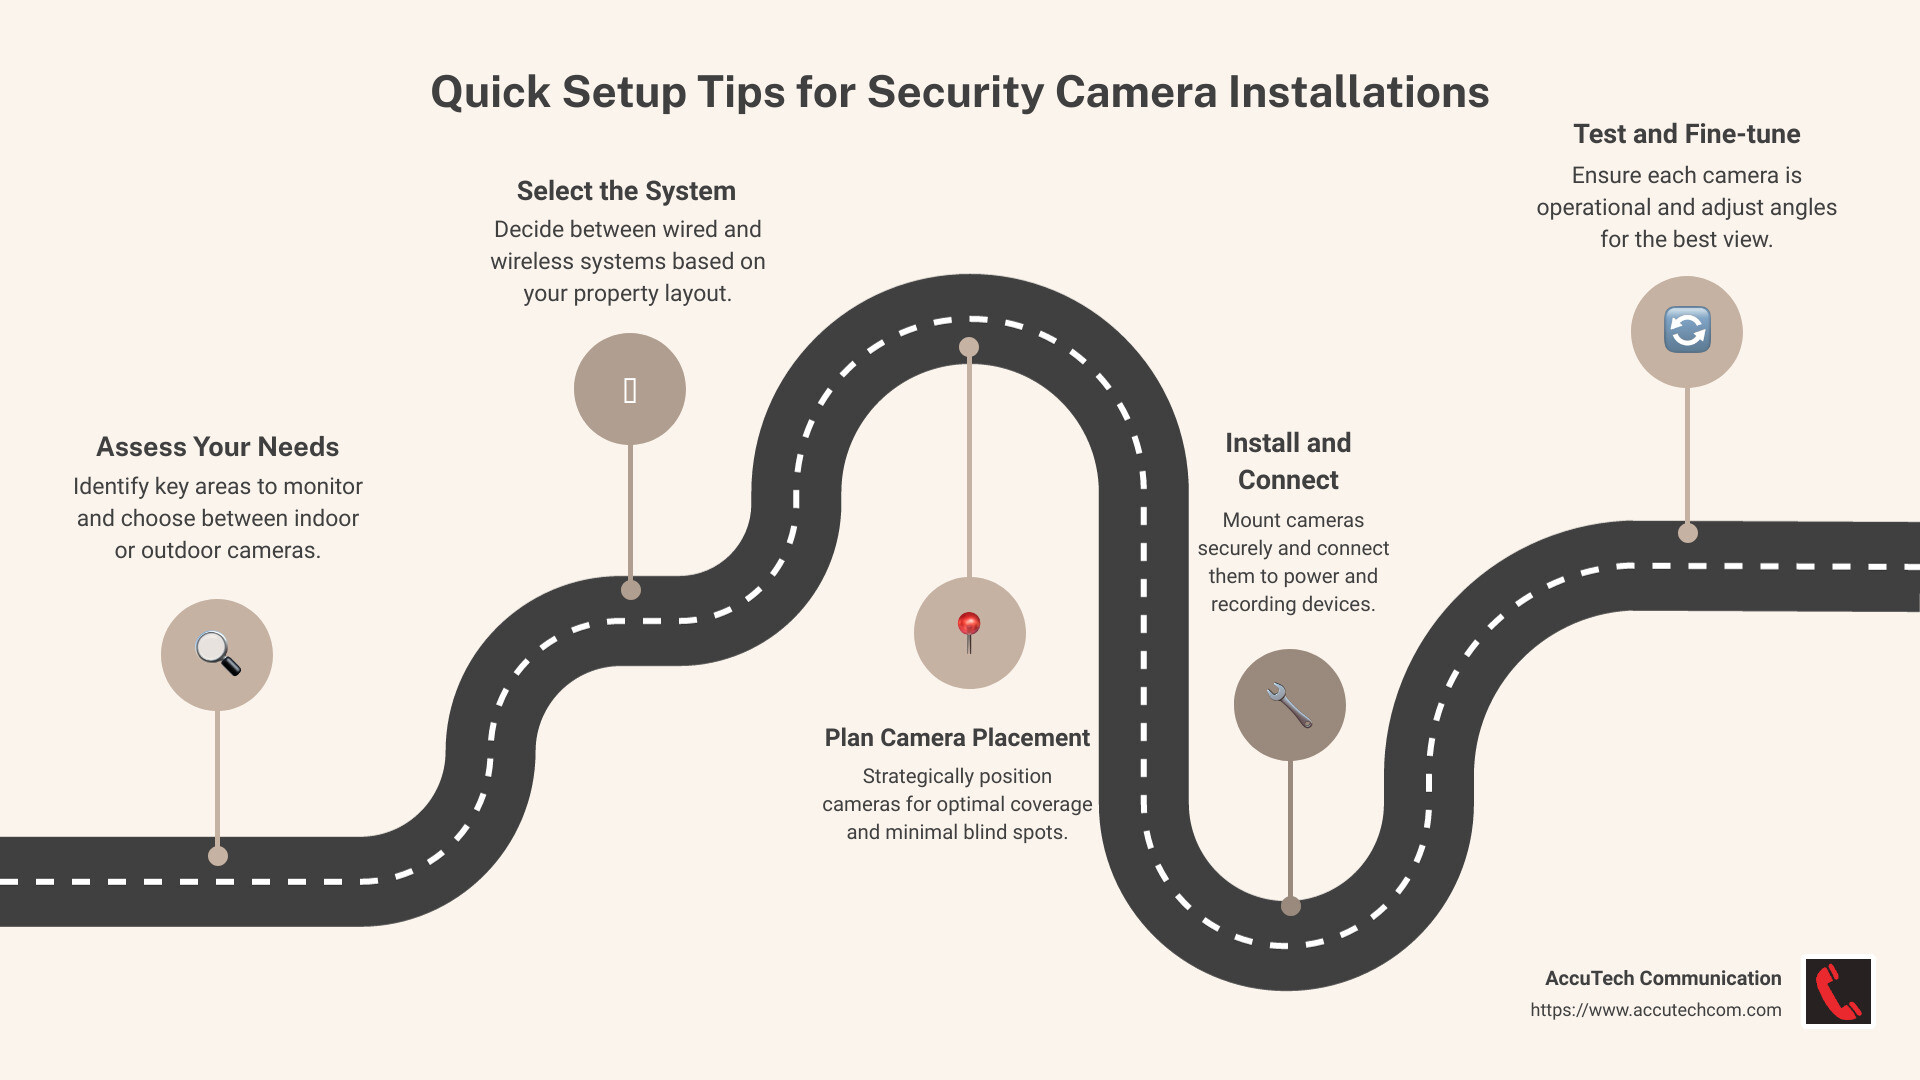
Step-by-Step Guide to Installing Security Cameras
Installing security cameras might seem daunting, but with the right steps, it becomes manageable. Let’s break it down into simple steps: location selection, drilling and wiring, power connection, and viewing footage.
Location Selection
First, decide where to place your cameras. Sketch a layout of your home and pinpoint areas you want to monitor. Common spots include entry doors, porches, and driveways. The goal is to cover all entry points.
- Walk around your property to ensure each spot has a clear line of sight and no obstructions.
- For outdoor cameras, place them at least 10 feet high to protect them from tampering and weather. This height also offers a better field of view.
Drilling and Wiring
If you opt for a wired system, you’ll need to run cables from each camera to a central DVR box. Here’s how:
- Use a mounting template to mark where to drill holes.
- Drill pilot holes for the mounting screws. Use a spade bit to drill a larger hole for the cables.
- Run the cables through the drilled holes. Use fish tape to guide cables through tight spaces or behind walls. This step may require extra hands for help.
Tip: Measure the distance beforehand to ensure your cables are long enough.
Power Connection
Next, connect your cameras to a power source:
- For wired systems, connect the cable from the wall to the camera. Then, attach it to a power outlet.
- For wireless cameras, insert batteries if required. Some models may also need to be plugged in.
Viewing Footage
Once your cameras are installed, it’s time to set up the viewing system:
- Connect wired cameras to the DVR box. Note the input port for each camera to easily switch between views.
- Link the DVR output to a monitor to watch the live feed.
- For wireless systems, install the accompanying software on your device. Follow the setup instructions to connect and view footage.
Tip: Record the IP address of your wireless camera for easy remote access via a web browser.
By following these steps, you’ll have a solid foundation for your security camera installations. Next, we’ll explore how to choose the right security camera system for your needs, including the differences between wired and wireless options.
Choosing the Right Security Camera System
When it comes to security camera installations, picking the right system is crucial. The choice between wired and wireless systems, along with camera types and features, can be overwhelming. Let’s break it down.
Wired Systems
Wired security camera systems are often preferred for larger properties. They provide a stable connection, as they aren’t affected by wireless interference. However, they require more effort to install due to the need for running cables throughout your property.
- Pros: Reliable, no interference, continuous power supply.
- Cons: Complex installation, limited by cable length.
Wired systems are ideal for businesses or large homes where consistent surveillance is necessary.
Wireless Systems
Wireless systems offer flexibility and easy installation. They connect to your network and provide remote access to live footage through an app. Though, that their performance can be affected by the distance from the receiver and potential interference.
- Pros: Easy to install, flexible placement, remote access.
- Cons: Potential for interference, may require battery changes.
Wireless systems are great for smaller homes or renters who want a DIY approach.
Camera Types
Choosing the right camera type is just as important. Here are some common options:
- Indoor Cameras: Designed for monitoring the inside of your home. They are usually smaller and less expensive.
- Outdoor Cameras: Built to withstand weather conditions. They often come with weather shields for added protection.
- Bullet Cameras: Long and cylindrical, ideal for viewing long distances.
- Dome Cameras: Offer a wide field of view and are less obtrusive.
Features to Consider
When selecting your cameras, consider features that match your needs:
- Night Vision: Essential for monitoring in low-light conditions.
- Motion Sensors: Save recording space by only capturing footage when movement is detected.
- Remote Viewing: Allows you to access footage from anywhere via a smartphone or computer.
- Two-Way Audio: Enables communication through the camera, useful for home security.
By understanding these options, you can tailor your security camera installations to meet your specific needs. Next, we’ll dive into tips for effectively placing your cameras, ensuring maximum coverage and security.
Tips for Effective Security Camera Placement
Proper placement is key to getting the most out of your security camera installations. Let’s explore the best practices for positioning your cameras both indoors and outdoors, considering height, distance, and weather protection.
Indoor vs Outdoor Placement
Indoor Cameras
When placing cameras inside, think about the areas you most want to monitor. Common spots include entryways, living rooms, and hallways. Ensure cameras are positioned to capture key areas without obstructions like doors or furniture.
- Avoid Placing Near Windows: Glass can cause glare and limit motion detection, making it harder for the camera to capture clear footage.
Outdoor Cameras
For outdoor areas, focus on entry points like doors, gates, and driveways. Outdoor cameras should be weatherproof and positioned to cover as much area as possible without being easily tampered with.
- Guard Every Entrance: It’s recommended to have a camera for each main entry point to your home. This can prevent unwanted visitors from going unnoticed.
Height and Distance
Optimal Height
Position cameras high enough to avoid tampering but low enough to capture clear images. A height of 8 to 10 feet is generally effective for both indoor and outdoor cameras.
- Angle Downward: Tilting the camera slightly downward improves motion detection and reduces false alerts.
Distance for Motion Detection
That most cameras have an optimal range for motion detection, typically between 5 to 20 feet. Placing cameras within this range ensures accurate detection and clear footage.
Weather Protection
Outdoor Weather Considerations
Outdoor cameras need protection from the elements. Choose models with weatherproof housing and consider additional protection like eaves or overhangs to shield from direct sunlight and rain.
- Avoid Direct Sunlight: Position cameras to minimize exposure to direct sunlight, which can cause glare and damage over time.
Maintenance Tips
Regularly check and clean your cameras to ensure they stay free of debris and function properly. This is especially important for outdoor cameras exposed to weather conditions.
By following these tips, you can maximize the effectiveness of your security camera installations. Up next, we’ll address common questions about the costs and professional requirements for installing security systems.
Frequently Asked Questions about Security Camera Installations
How much does it cost to install security cameras?
The cost of security camera installations can vary widely. On average, you might spend between $100 to $500 per camera, including both equipment and installation. Several factors can affect this cost:
- Type of Camera: Wired systems tend to be more expensive than wireless ones due to the complexity of installation.
- Number of Cameras: More cameras mean higher costs. Consider your property’s size and how many areas you need to monitor.
- Professional Installation: Hiring a professional can add to the cost, but it ensures proper setup and functionality.
Do you need an electrician to install security cameras?
Whether you need an electrician largely depends on the type of system:
- Wired Systems: These often require drilling, wiring, and connecting to a power source, which might be best handled by a professional. An electrician can ensure all electrical components are safely and correctly installed.
- Wireless Systems: These are generally easier to install and might not require professional help. However, if you’re uncomfortable with any part of the setup, a professional can assist.
What do you call a person that installs security cameras?
A person who installs security cameras is typically known as a security systems installer. These professionals specialize in setting up and maintaining security systems, ensuring everything works as it should.
- Professional Services: Companies like AccuTech Communications offer reliable installation services. Their technicians have the expertise to handle both simple and complex installations, providing peace of mind and ensuring your system is up and running smoothly.
By understanding the costs, requirements, and professional services involved, you can make informed decisions about your security camera installations. Let’s move on to choosing the right security camera system for your needs.
Conclusion
When it comes to security camera installations, choosing the right partner can make all the difference. AccuTech Communications stands out as a trusted provider, offering reliable service and competitive pricing since 1993. Our commitment to quality ensures that businesses in Massachusetts, New Hampshire, and Rhode Island receive the best solutions custom to their specific needs.
We understand that security is paramount for any business. That’s why our certified technicians ensure that every installation is done right the first time. With AccuTech, you don’t just get a service; you get a partner dedicated to safeguarding your assets and providing peace of mind.
Our competitive pricing doesn’t mean compromising on quality. Instead, it reflects our efficiency and expertise in delivering top-notch services without breaking the bank. Whether you’re looking to install a single camera or a comprehensive surveillance system, we offer solutions that fit your budget and requirements.
For more information on how we can assist with your security needs, visit our network cabling installation page. Let us help you create a secure environment with confidence and ease.
When security is more crucial than ever, trusting AccuTech Communications means choosing a partner who values your safety as much as you do.
